
Roxanne Smolen
Ever think about self-publishing a book using CreateSpace? Maybe you have hesitated because you were nervous about the expertise needed to digitally format the manuscript to look professional. Well, Roxanne Smolen has worked through the process, wrote up the step-by-step process below, and is willing to share it with you.
Here is Roxanne:
I think of myself as an Indie author, although I’m actually a hybrid. I have seven books published by a small publisher. Those books can be found in every book selling venue possible. But honestly, almost all my sales are through Amazon. I started thinking, why sell through a publisher and give them a healthy cut when I can make more money by doing it myself?
So I began self-publishing. I published two middle-grade books that I wrote with my young granddaughters (under the name R.A.P. Smolen), four writer’s advice books that I wrote with seven other authors (under the name of C. S. Writers), a science fiction novel that I wrote about a woman who literally goes to hell (Satan’s Mirror), and the first three novels of my current book series (The Amazing Wolf Boy).
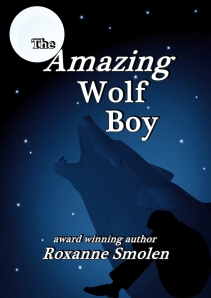 The Amazing Wolf Boy is a humorous paranormal romance for young adults about a sixteen-year-old nerd who turns into a werewolf during Christmas Eve dinner. His parents banish him to Florida (That’s where I live. What a coincidence.) where he fails to fit in with the other kids. You can buy book one here.
I’m pretty proud of the book, not only because I wrote it but because I published it. Self-publishing does not carry the stigma it once did. If you are thinking about publishing your own book, my biggest piece of advice is to proofread and edit carefully. It’s so easy to publish a book nowadays authors are putting their work out there with all sorts of errors. You don’t want to be that guy.
The best thing, of course, is to hire an editor. But good editors are expensive, and many of us can’t afford such an investment. If you plan to do it yourself, I have a tip for you—change your font. Just for the editing process. Make it something a little difficult to read, like Broadway or Impact. Something to make you focus. Your brain doesn’t always read what your eyes see; it reads what you thought you wrote. That’s why we can read over a sentence with a misspelled or missing word twenty-five times and not pick it up. If you change your font, your brain will think it’s reading something new and it will pay attention.
 I would also advise you to take care with your book formatting. Readers don’t have the patience to read text with large gaps or ragged indents. On that note, I have written a tutorial.
How to Format Your Book for CreateSpace
I get a lot of formatting questions, so I thought I’d put it all down in one place. If you find it useful, let me know.
Note: I use Word 2010. Your version of Word might look a bit different, but it should be similar enough for you to figure out.
And now, without further ado, here is how I format a book for CreateSpace.
Ready, Set, Go
- Open your Word .doc
- Set the margins. Go to PAGE LAYOUT –> MARGINS –> CUSTOM MARGINS.
- Under the Margin Tab, make the top 1″, the bottom 1″, the inside .9″, and the outside .6″.
- Orientation should be Portrait.
- Multiple Pages should be changed to Mirror Margins. That’s it for the Margin Tab. Don’t close the box yet.
- Then under the Paper Tab, change the Paper Size to the size of the book you are planning to publish. I like my books to be 8″ by 5″ so I change:
- Width to 5″
- Height to 8″. Then click OK to close the box.
- SELECT ALL (it’s over in the top right-hand corner.) Delete all tabs by using REPLACE (also in the top right-hand corner.)
- Go to the Replace Tab
- Click More
- Click Special
- Click Tab Character
- Leave REPLACE WITH blank
- Click REPLACE ALL
- SELECT ALL
- Click the corner box next to Paragraph.
- Under Indentation, go to SPECIAL
- Select FIRST LINE
- Under BY type .25
- SELECT ALL
- Change line spacing to 1.5
- Click both REMOVE SPACE BEFORE and REMOVE SPACE AFTER so both read ADD.
- SELECT ALL
- Change your font and font size. I usually use Georgia 12pt.
- SELECT ALL
- Justify your margins. Yes! Don’t argue with me.
- SELECT ALL
- Under PAGE LAYOUT, click Hyphenation and Automatic.
- SELECT ALL. Make sure you don’t have any double spaces after punctuation. (This is for all us older authors because we were taught that in high school.)
- Go to the Replace Tab
- Under FIND WHAT, hit the spacebar twice
- Under REPLACE WITH, hit it once
- Click REPLACE ALL
- Make sure the end of every chapter/short story has a new page character.
- Go to PAGE LAYOUT –> BREAKS
- Under Section Breaks, click NEXT PAGE (One caveat to this is if you are publishing a book of short stories. You want each story to start on the right-hand side, right? Or some people want each chapter to start on the right. In that case you would click ODD PAGE.)
- There should be no page numbers, headers, or footers on blank pages.
Front Matter Matters
In order:
- TITLE PAGE
- Use a larger font and make it bold.
- Type your book title about halfway down the page.
- Type your name at the bottom. (This should give you plenty of room to sign at book signings.)
- End the page. (PAGE LAYOUT –> BREAKS –> NEXT PAGE)
- COPYRIGHT PAGE
- Type in your Copyright Notice.
- Example: This is a work of fiction. The characters and events described herein are imaginary and are not intended to refer to specific places or to living persons alive or dead. All rights reserved. No part of this publication may be reproduced, distributed, or transmitted in any form or by any means, including photocopying, recording, or other electronic or mechanical methods without the prior written permission of the publisher except for brief quotations embodied in critical reviews.
- Copyright © (date) by (your name)
- ISBN (Type in the number provided by CreateSpace.)
- You can also add your publishers name, state, website, and logo if you have started your own company.
- End the page. (PAGE LAYOUT –> BREAKS –> NEXT PAGE)
- DEDICATION PAGE
- This is optional. If you are dedicating your book to a loved one or an organization, type it here.
- End the page. (PAGE LAYOUT –> BREAKS –> NEXT PAGE)
- TABLE OF CONTENTS
- You should have a table of contents to list each chapter or short story.
- Go to REFERENCE and click Table of Contents.
- End the page. (PAGE LAYOUT –> BREAKS –> NEXT PAGE)
- NOTES
- If necessary, add a blank page at this point (PAGE LAYOUT –> BREAKS –> NEXT PAGE) so that the first page of your story starts on the right-hand side.
- There should be no page numbers, headers, or footers on the FRONT MATTER (or the back matter either for that matter.)
Back Matter Matters Too
- Add a page for Your Author’s Bio, headshot (I mean a photo, not an actual… although if you’re writing horror and you’re good with make-up…) website, and email address.
- End the page. (PAGE LAYOUT –> BREAKS –> NEXT PAGE)
- Add another page for a list of your previous works and where to buy them.
- End the page. (PAGE LAYOUT –> BREAKS –> NEXT PAGE)
- If you are writing a series, you can put an excerpt of an upcoming book here.
- Remember, there should be no page numbers, headers, or footers on the front or back matter unless you want to use Roman Numerals.
About Your Headers and Footers
- Go to the first page of your story. (Story, not Front Matter.)
- Click INSERT.
- Click HEADER.
- Choose your Header Style. (I usually use Blank.)
- Type the name of your book. (I recommend using a smaller font.)
- Highlight what you just typed and Right align it. (On the Home Tab.)
- Under HEADER & FOOTER TOOLS click ODD & EVEN PAGES.
- Make sure LINK TO PREVIOUS is not selected.
- Now go to the second page of your story.
- Click the Header and type your name.
- Highlight what you typed and Left align it.
- You should now have your Title on the right and your Name on the left on alternating pages.
- Check to be sure the header hasn’t shown up on your Front Matter.
- If it has, delete it and de-select LINK TO PREVIOUS on each page.
- Go back to the first page of your story.
- On the left-hand side of the HEADER & FOOTER TOOLBAR, you will see Page Number. Click it.
- Choose Bottom Of The Page.
- Choose your style. I use Plain Number 2.
- Note: You will have to do this twice—once for the right-hand (odd) side and once for the left-hand (even) side.
- Note: You may have to format the page numbers to get them to run consecutively. To do that, click Page Number again and scroll down to Format Page Number.
Kill the Widows and Orphans
Widow
- A paragraph-ending line that falls at the beginning of the following page/column, thus separated from the rest of the text.
Orphan
- A paragraph-opening line that appears by itself at the bottom of a page/column.
- A word, part of a word, or very short line that appears by itself at the end of a paragraph. Orphans result in too much white space between paragraphs or at the bottom of a page.
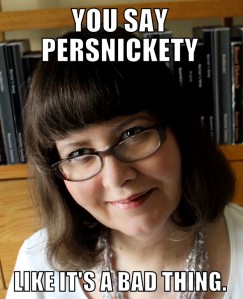
Word kills your widows and orphans by default, but the result makes a ragged bottom margin. I’m one of those persnickety people who feel that when you open a book, the bottom margin on both pages should match up. So I kill them manually.
- Click the corner box on PARAGRAPH.
- Click the LINE AND PAGE BREAKS Tab.
- Uncheck Widow/Orphan Control.
- Go through each page of your 500 page book and look for Widows and Orphans, adding or deleting words until the page looks right.
And Another Thing…
The first paragraph of each chapter and after a drop should be flush left, meaning don’t indent. Also, the first letter of the first word of that paragraph should be fancied up. I’m sure you’ve all seen the first letter in a different font with scroll work, etc. The problem is that it messes with the line spacing of the paragraph. The only work-around I know is to insert a picture of the necessary letter in the desired fancy font and then have the text wrap it so there is no problem with the spacing. But that is a lot of work for little gain. I just bold the first letter and leave it in the same font as the rest of the paragraph.
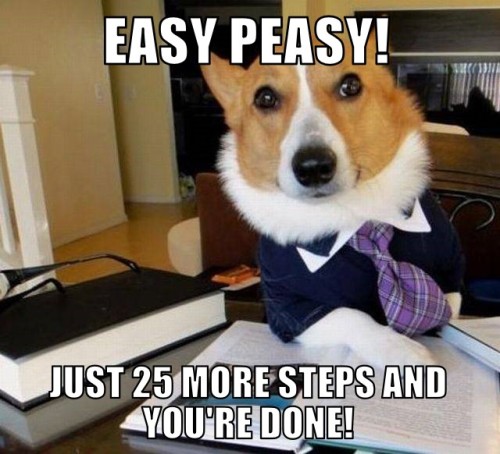
Easy Peasy
When all looks good, you need to save the book as a PDF. Word can do this for you.
FILE –> SAVE AS –> PDF
Now you are ready to upload the .pdf to CreateSpace.
See? It’s as easy as 1, 2, 3… 4, 5, 6… Oh, you get the picture.
Thank you Roxanne for sharing this process with everyone. I know this will help a lot of writers, if not now, later. I am sure they will want to save this for future use. Here is the link to visit Roxanne’s blog: http://www.moonrox.wordpress.com/
Talk soon,
Kathy

Thanks for laying this out, Roxanne. This is the clearest step-by-step how-to I’ve read in a long time.
LikeLike
By: molloutthere on November 18, 2014
at 6:33 pm
Rox, you are a font of knowledge and kind enough to share it. Good information.
LikeLike
By: Betty Housey on November 19, 2014
at 3:43 pm
What a great post! Thanks for all this information.
LikeLike
By: Samantha on November 21, 2014
at 9:30 am
I realize this was posted some time ago, but I have to say, “Thank you!” This was more than helpful. The clear, simple, thorough way you led me through the formatting process was perfect. This was my second attempt to prepare my book for CreateSpace. The first was beyond frustrating, but not this time. Again, “Thank you!”
LikeLiked by 1 person
By: thoughtseeds on July 17, 2015
at 10:39 pm
Great Post…Really very very helpful…thank you so much Roxanne. I’ve formatted my book for createspace based on the step by step instructions that you’ve provided. I just have only one issue and that is I don’t want my front matter pages to be numbered. I want that the numbering start from the first chapter onwards, would you please help me solving this issue.
LikeLiked by 1 person
By: candice on February 17, 2016
at 10:38 am
Thanks so much Roxanne! Formatting my book today for CreateSpace and this has saved me so much time and tears!
LikeLike
By: Kieran Higgins (@kieran__higgins) on April 30, 2016
at 8:44 am
Thank you! I will be formatting my book this week for CreateSpace and I wasn’t comfortable letting anyone do it without me. I knew that I couldn’t do this completely alone so I Googled around for answers. I’m incredibly grateful to have found this information. You’re such a blessing to me. Thanks so much for choosing to share this information! What a relieve…
LikeLike
By: Jennifer Quetant on June 16, 2016
at 2:45 pm
Excellent. Thank you. Since you wrote this has anything changed? I appreciate your time. ❤
LikeLike
By: Silver Threading on October 3, 2016
at 4:01 pm
Thank you! Your instructions are fabulous! So easy to follow…that even I can do it!
LikeLike
By: Susan Gable on October 26, 2016
at 7:46 am
Thank you so much. I was getting really frustrated. Maybe you should title this “How to format, for dummies”! Only, probably, I’m the only one and everyone else knows a bit more than me 😀 But really, thank you ! It helped me a lot!
LikeLike
By: Dr.nazreen on December 8, 2016
at 11:51 pm
Thanks for making it look so easy. Just need to know how I can do this in Word for Mac, because a lot of what you said up there, I just can’t seem to find in the Mac version of Word.
If you could please help.
LikeLike
By: Sunil on December 14, 2016
at 5:38 am
Reblogged this on RAZZMATAZZ Books and commented:
More tips for Writers, this time the theme is Formating.
LikeLike
By: Author Winona Rasheed on January 7, 2017
at 11:08 am
Thanks for this I will try it out. The real sticky part for me is page numbers. I will get back here if I found it worked.
LikeLike
By: michael gallagher on February 2, 2017
at 4:45 pm
Did figure out the page number thing?
I used another site yesterday for instructions. My page numbers begin on the cover…that ain’t gonna work.
I hope Ms Smolen’s route handles that.
LikeLike
By: Hugh Yonn on November 15, 2017
at 11:56 am
Hi, this all sounds very helpful. Will be needing this soon… 🙂
LikeLike
By: Marje @ Kyrosmagica on May 1, 2017
at 1:40 pm
Thank you so much for posting this! This is really useful. I always have a hard time with headers and page numbers, so that’ll get interesting, but this was great to run through to get an idea of how long my book is going to wind up.
LikeLike
By: Ashley D. on June 4, 2017
at 12:04 am
You are the best! Wish I’d found this earlier!
LikeLike
By: Jeanie M on June 14, 2017
at 11:45 pm
Thank you for this! ❤
LikeLike
By: Sara Flower Kjeldsen on August 3, 2017
at 12:46 am
Thanks so much!
LikeLike
By: Deborah on October 10, 2017
at 4:37 am
[…] Myself, I did not use a template to format my books, instead I googled tutorials on the internet. THIS is a good one that I have saved in my bookmarks. For formatting templates DIYbookformats.com is […]
LikeLike
By: Self Publishing 101: Part One – Alyne Hart Novels on October 16, 2017
at 10:36 am
Absolutely excellent! Thank you!
LikeLike
By: sbose2017 on November 2, 2017
at 2:18 pm
Thank you so much! This is the best I have seen and now I can format my book without sweating. My question is the chapter page. The first line usually starts around mid-way down the page and it also doesn’t have a header of a footer on this page. Is this done manually or is there a formatting way to do it?
LikeLike
By: Vivian E Boyko on November 9, 2017
at 7:15 pm
Bless you, Chil’…
You saved my life…this is the best ‘how to’ on the web, bar none.
LikeLike
By: Hugh Yonn on November 16, 2017
at 4:20 pm
A video of all this would be worth selling. I would pay to have this at my finger tips. Or a utube nice and slow, showing page setups, headers, footers, styles ,TOC. Just the whole nine yards. Putting word into kindle set up, then changing to create space set up. Let me know so I can get a copy
LikeLike
By: Carol Burgess on December 6, 2017
at 12:04 pm
[…] took the same approach with formatting my books. I used this tutorial for the paperback, and Calibre to make the MOBI file (the one accepted by Amazon for ebooks). I won’t lie; this […]
LikeLike
By: Which Self-Publishing Tasks Should You Outsource, and Which Should You Do Yourself? on December 8, 2017
at 1:05 pm
Thank you, Roxanne! I open a create space account months ago, haven’t done too much yet. Thank you for the step by step explanation. Someone is selling the idea for $995 with $500 discount but still charges $495!!!
I’ll do more work on this after the holidays. Thanks again!
LikeLike
By: Miriam Hurdle on December 21, 2017
at 7:07 pm
I used this for my second book and it demystified the process and exponentially improved my submission success. This was an absolute godsend for me. Not only did I only have to upload this once, an right the first time, but it was beautiful and formatted it in ways I had not thought to do. So amazing. Thank you does not express the absolute depth of my gratitude.
LikeLike
By: Brian Clark on June 14, 2018
at 2:31 am
Dear Roxanne, I have been using your formatting information since about 2013 and am now preparing to self-publish my 23rd book. You have been a Godsend to this writer. Thank you so much!
Roger Trammell92586@frontier.com
LikeLike
By: Roger Trammell on June 5, 2020
at 7:05 pm